配置wordpress由http变成https
根据上两篇文章,已经把wordpress部署到网站上面了,但是用谷歌浏览器访问,还是会显示不安全。所以这里需要解决一下。
1,安装certbot 用于加密我们的客户端
这里我的服务器的系统是Ubuntu 18.04的,必须要已经安装过nginx。
开始安装certbot,首先我们需要添加这个软件到ubuntu的软件仓库中(repository)或者叫软件源。
sudo add-apt-repository ppa:certbot/certbot
然后下一步。
在上一个步骤中我们发起添加这个软件到ubuntu的命令中了,所以这个步骤当中我们首先更新软件仓库,然后在下载安装
sudo apt update
sudo apt install python-certbot-nginx
按y然后ENTER完成下一步。
2,配置防火墙
如果你之前没有做过这个,哪在这个步骤当中,你就需要允许开启ufw 防火墙,并且添加nginx到其中。在开启使用ufw之前,要确保已经添加SSH到ufw中,要不然有可能你远程访问不了你的服务器。(其实这个服务器中已经添加SSH)
sudo ufw allow OpenSSH
然后添加’Nginx Full’配置文件, 之后在删除重复的那个‘Nginx HTTP’配置文件(如果之前添加了的话)。
sudo ufw allow 'Nginx Full'
sudo ufw delete allow 'Nginx HTTP'
这个时候察看一下ufw的运行状态。
sudo ufw status
应该会出现如下的输出:
Status: active

To                         Action      From
--                         ------      ----
OpenSSH                    ALLOW       Anywhere
Nginx Full                 ALLOW       Anywhere
OpenSSH (v6)               ALLOW       Anywhere (v6)
Nginx Full (v6)            ALLOW       Anywhere (v6)
重点:如果输出的状态显示的是:inactive的话,说明ufw根本就没有开启,这个时候怎么办???
答案是:当然手动开启了啊,使用命令
sudo ufw enable
就可以开启了。。。。(我他么被折腾了好一会。。。。)
开启了之后,在查一下运行状态就会出现上面的输出了。。。。
3,添加域名到nginx的配置文件中的server block中去
certbot 这个软件自动的配置ssl 到nginx上,通过寻找server_name这个指令。如果你还没有添加你的域名到配置文件,你需要自行添加域名到配置文件中的server_name 的后面。
即:
sudo vim /etc/nginx/sites-available/default

...
server_name example.com www.example.com;
...
save and exit.
检查一下nginx是不是合法。
sudo nginx -t
如果没有的话,重启nginx服务
sudo systemctl restart nginx.service
4,获取一个SSL的证书
我们现在可以用certbot这个软件来生成一个certs。这里需要注意下,无论你是不是用www开头做你的域名(即:www.example.com和example.com),你这里都需要显示在命令行中的标识出来 ,怎么标识多个域名?
用-d来分隔多个你想添加的域名。比如下:
sudo certbot --nginx -d example.com -d www.example.com -d map.example.com -d example.com.cn //多个域名每一个都需要写出来,用-d分隔。
输出如下:
Saving debug log to /var/log/letsencrypt/letsencrypt.log
Plugins selected: Authenticator nginx, Installer nginx
Enter email address (used for urgent renewal and security notices) (Enter 'c' to
cancel):
可以在这里输入一个email地址,用来安全提示和紧急提醒。
然后输出:
Please read the Terms of Service at
https://letsencrypt.org/documents/LE-SA-v1.2-November-15-2017.pdf. You must
agree in order to register with the ACME server at
https://acme-v01.api.letsencrypt.org/directory
-------------------------------------------------------------------------------
(A)gree/(C)ancel:
这里输a然后下一步
Would you be willing to share your email address with the Electronic Frontier
Foundation, a founding partner of the Let's Encrypt project and the non-profit
organization that develops Certbot? We'd like to send you email about EFF and
our work to encrypt the web, protect its users and defend digital rights.
-------------------------------------------------------------------------------
(Y)es/(N)o:
这里y和n都可以,看你愿不愿了。选择之后,下一步。
Obtaining a new certificate
Performing the following challenges:
http-01 challenge for example.com
http-01 challenge for www.example.com
Waiting for verification...
Cleaning up challenges
Deploying Certificate to VirtualHost /etc/nginx/sites-enabled/default
Deploying Certificate to VirtualHost /etc/nginx/sites-enabled/default
certbot在为你的域名尝试获取证书。
如果上面都没问题的话,会跳出来一个选项,让你选择是http跟https混合使用,还是强制所有的request请求都redirect重定向走https。
Please choose whether or not to redirect HTTP traffic to HTTPS, removing HTTP access.
-------------------------------------------------------------------------------
1: No redirect - Make no further changes to the webserver configuration.
2: Redirect - Make all requests redirect to secure HTTPS access. Choose this for
new sites, or if you're confident your site works on HTTPS. You can undo this
change by editing your web server's configuration.
-------------------------------------------------------------------------------
Select the appropriate number [1-2] then [enter] (press 'c' to cancel):
这里选择redirect吧。全部走https吧。会挑出来如下输出:
Redirecting all traffic on port 80 to ssl in /etc/nginx/sites-enabled/default
Redirecting all traffic on port 80 to ssl in /etc/nginx/sites-enabled/default

-------------------------------------------------------------------------------
Congratulations! You have successfully enabled https://example.com and
https://www.example.com

You should test your configuration at:
https://www.ssllabs.com/ssltest/analyze.html?d=example.com
https://www.ssllabs.com/ssltest/analyze.html?d=www.example.com
-------------------------------------------------------------------------------

IMPORTANT NOTES:
- Congratulations! Your certificate and chain have been saved at:
/etc/letsencrypt/live/example.com/fullchain.pem
Your key file has been saved at:
/etc/letsencrypt/live/example.com/privkey.pem
Your cert will expire on 2018-08-12. To obtain a new or tweaked
version of this certificate in the future, simply run certbot again
with the "certonly" option. To non-interactively renew *all* of
your certificates, run "certbot renew"
- If you like Certbot, please consider supporting our work by:

Donating to ISRG / Let's Encrypt: https://letsencrypt.org/donate
Donating to EFF: https://eff.org/donate-le
到这里一部基本上就设置完成了。
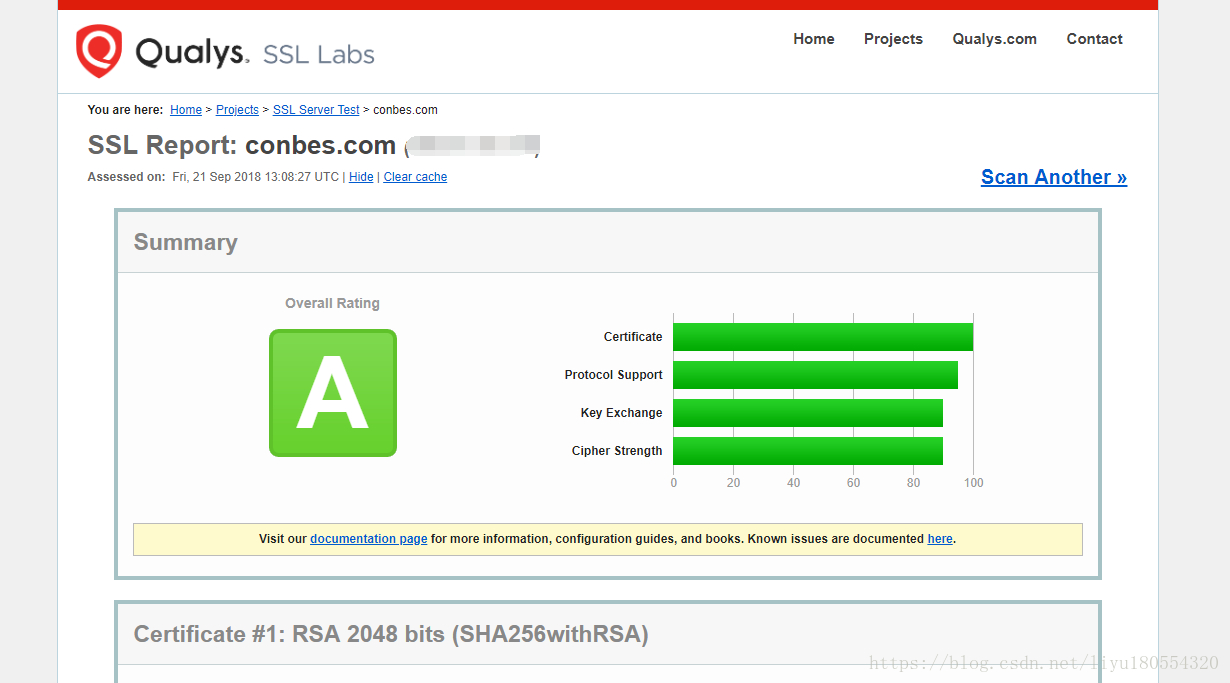
5,测试SSL
现在可以去ssllabs.com/ssltest/这个网站去测试你的网站,测试成功的界面如下:
6,自动续约更新
上面certbot做的认证只保证90天的使用时间,所以我们需要周期性的让他自动更新这个认证。
certobt会自动的一天两次运行,并且会自动更新还有30天以内的任何证书。但是我们怎么知道这个certbot有没有在后台运行???
所以使用命令:
sudo certbot renew --dry-run
就可以看到结果
以上就完成了由http到https的转变。
7,修正由http到https之后,网站显示错乱的办法。
经过上面的步骤,确实在浏览器里面,变成了一把锁,不再提示不安全了。
但是网站显示又有问题了,为什么???
因为网站使用的css啊js啊,一些”特效”他们的链接还是http的,不信的话,可以在乱码的网页里面查看一下源码,可以看到还是http开头的。
所以这里需要改一下,有两种方法修改:
####1,传统方式:
1.登录和后台强制开启ssl,可以通过修改wp-config.php文件,在末尾加上两行代码
define('FORCE_SSL_LOGIN', true);
define('FORCE_SSL_ADMIN', true);
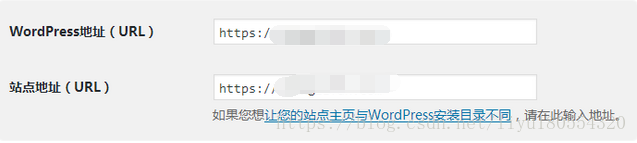
或者在确认 WordPress 站点已经开启 https 协议并可以通过 https 访问,那么可以直接登陆后台,通过“设置”中“常规”里面把“WordPress 地址(URL)”、“站点地址(URL)”两个地址的 http 修改为 https 并保存。
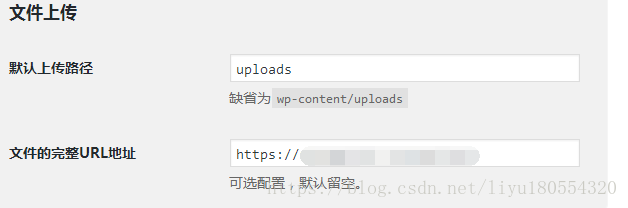
2.然后还需要确定的就是通过“设置”中“多媒体”菜单把“文件的完整 URL 地址”也改为 https 协议,如果文件的完整 URL 地址之前是缺省的,那么也就可以不用修改。
3.同时为了保证 WordPress 站点之前添加的各个链接或者多媒体文件把 http 协议改成 https 协议,我们还需要通过数据库 SQL 查询执行一条替换命令,代码如下:
update wp_posts set post_content = replace(post_content, 'http://example.com','https://example.com');
2,方法二、代码方式让 WordPress 开启整站 HTTPS 协议
如果使用了 WordPress 的多媒体上传和插入图片附件的时候,附件都被 WordPress 标记为了绝对链接,一般需要修改数据库,这种方法不好。
以下代码不仅仅支持 WordPress 站内链接支持 HTTPS 协议,支持多域名的多媒体附件 HTTPS 协议,同时也新增方法二相对链接功能支持。
编辑当前主题下的 functions.php 文件,加入以下代码:
代码一:HTTPS 绝对链接替换
add_filter('get_header', 'fanly_ssl');
function fanly_ssl(){
 if( is_ssl() ){
  function fanly_ssl_main ($content){
   $siteurl = get_option('siteurl');
   $upload_dir = wp_upload_dir();
   $content = str_replace( 'http:'.strstr($siteurl, '//'), 'https:'.strstr($siteurl, '//'), $content);
   $content = str_replace( 'http:'.strstr($upload_dir['baseurl'], '//'), 'https:'.strstr($upload_dir['baseurl'], '//'), $content);
   return $content;
  }
  ob_start("fanly_ssl_main");
 }
}
代码二:HTTPS 相对链接替换
//WordPress SSL
add_filter('get_header', 'fanly_ssl');
function fanly_ssl(){
 if( is_ssl() ){
  function fanly_ssl_main ($content){
   $siteurl = get_option('siteurl');
   $upload_dir = wp_upload_dir();
   $content = str_replace( 'http:'.strstr($siteurl, '//'), strstr($siteurl, '//'), $content);
   $content = str_replace( 'http:'.strstr($upload_dir['baseurl'], '//'), strstr($upload_dir['baseurl'], '//'), $content);
   return $content;
  }
  ob_start("fanly_ssl_main");
 }
}
以上就为大家提供了两种实现的方式,方法一主要是通过直接修改 WordPress 的配置以及将之前的 http 协议直接通过数据库执行替换命令修改为 https 协议,这样算是一个一劳永逸的方式,同样网站以后也将必须使用 https 协议才能访问,如果哪天服务器关闭了 SSL 证书,那么很遗憾的告诉你,你还需要使用方法一中的方式反过来操作,如果你非常确定网站以后都会使用 https 协议,那么推荐使用方法一。
如果你是一个喜欢折腾,有太多不确定因素,那么可以使用方法二,同样还提供了两种代码解决方式都可以完美支持 HTTPS 协议,如果你的站点需要支持 HTTP 和 HTTPS 双协议共存,那么就选择使用代码二的相对链接替换方法吧,反之则推荐实用代码一的绝对链接替换方法。
以上基本上就解决了显示错乱的问题。
综上;
参考文件
https://zhangzifan.com/wordpress-ssl-link.html
https://devanswers.co/lets-encrypt-ssl-cert-nginx-ubuntu-18-04/
感谢两位大神的博客,谢谢!
本文转自 https://blog.csdn.net/liyu180554320/article/details/82808145,如有侵权,请联系删除。
版权声明:
作者:亦灵一梦
链接:https://blog.haokaikai.cn/2022/weihu/linux/1156.html
来源:开心博客
文章版权归作者所有,未经允许请勿转载。